Indoor Hydroponic Gardening
/“Growing plants in water without the use of traditional soils”

Basil
Why grow hydroponically?
· Uses water more efficiently.
· Provides fresh salad food daily, without pesticides, herbicides or virtually any bugs. Therefore, there is no need to wash your harvest.
· Full control of nutrients for optimal growth.
· Grows faster with higher yields.
· Provides lettuce and herbs all year round, if desired.
· Cheaper than buying from a store, without risk of spoiled or contaminated products.
· Fresh herbs make nice gifts to your friends.
· A scaled-up version of this could be used as a small commercial venture with restaurants.
Cons:
· It takes time. It takes time to grow plants (although it’s quite fascinating).
· It is more complicated than growing in soil.
Initial $$ investment is considerable vs. growing in soil. Some methods are cheap.
Like pets, the operation requires attention. Initially, the setup doesn’t require daily watering. When you start harvesting, the plants are large, and they drink a lot of water. With two tubs going, about 4 litres a day must be added (+/- a litre or two). You can go away for 3 days, but you will need a friend or spouse to add water every couple of days to go away much longer.
Possible humidity issues if in a confined space. Don’t confine to a closed-in space without ventilation (use a fan and allow humidity into the rest of your living quarters).
Possible bothersome aphids or spider mites. Discussion below.
NOTE: There are a few different techniques regarding hydroponic growing. This is the Deep Water Culture system. Basically, the plant roots exist in a tub of water with air pumped into the water for required oxygenation. Other methods can be found on the internet.

What do you need?
You need some room. The setup below sits on an old desk (should be water resistant!) that is about 5’ wide and 2.3’ deep. A sink nearby is very beneficial. Having a 10-litre water jug is helpful. The room should be at least 20C, although the light system may add some warmth. Water will be spilled, so shag rug underneath is not a great idea.
Lighting: This setup uses a MIGRO ARRAY 4, which is an efficient 250W grow light with four Samsung LED bars covering an area of 4’ X 2’. It is suspended from the ceiling and is easily height adjustable. It is designed for full cycle growth, with a designed light spectrum. Easy to set up and install. It plugs in to a metal driver that can be mounted, and allows for dimming. The lighting is very bright! There is some heat given off by the lights and the driver, so ventilation (a fan) is a good idea. The lighting (and the fan) are plugged into a timer that has been set for 14 hours/day. These units cost about $375, but there are variations and other manufacturers. It’s best to review the latest studies on which ones to purchase.
Cost to run these lights: 250 watts X 14 hrs/day /1000 = 3.5 kWh/day X $0.085/kWh = $0.29/day or $109/year. This does not include the cost of running the fan (20W?), the pump (4W), or the timer. Your electrical rate may differ.
Note that T5 fluorescent grow light fixtures can also be used. They come in a variety of lengths, they are very light and cost efficient as well. Generally, it’s harder to get as much light intensity as the LED units, but small ones can be on a cart or shelf in the kitchen.
Fan: Running a Honeywell 7” HT900C from Amazon. About $25. Lightweight, and mounts on the wall. Works very well to help cool the lights and driver. Ventilation is very important for maintaining sufficient CO2, cooling, and humidity reduction. The fan runs 14 hours/day while the lights are on.
Pump: Using a 4 watt aquarium pump with two output nozzles (a $43 Danner brand from Amazon). It works OK running an air stone in two different tubs, but a more powerful one is recommended. You will also need airline tubing, the air stones, and suction cups. These come as kits on Amazon ($14). The pump runs 24 hours/day.
Timer: A good quality digital or analog timer that can have two output plugs. Canadian Tire has a Noma outdoor digital timer for $30.
Water: Having a sink near by is ideal. The setup described (2 tubs with ~ 8 plants) starts drinking 2-4 litres/day. Plus you will be germinating seeds, etc. To avoid chlorination effects, it’s best to store water in the 10-litre container for 24 hours or so to allow the chlorine to dissipate. This also allows the water to reach room temperature.
It’s a good idea to have two measuring devices: a digital pH meter (eg. HM Digital pH-80; ~$57 on Amazon), and an electrical conductivity/TDS meter (eg. HM Digital COM-80; ~$46 on Amazon).
Certain plants require certain pH ranges for optimal growth. The pH of our local tap water is ~ 7.7, and the water is very hard. Basil likes a pH range of 5.5-6.5. Therefore, you require “pH Down” to lower the pH to the desired range. This should be monitored and adjusted as required (once or twice a week). Generally, 6.0 accommodates most plants. A popular product is Indo pH Down Hard Water ($18 for 500ml which would last at least a year). This is a caustic liquid, so handle it carefully.
All plants require fertilizer. Since you are growing the plants in water, you simply add appropriate nutrients to the water, using the TDS meter as a guide. A popular brand is General Hydroponics MaxiGro 10-5-14 ($36 for a 2.2lb bag, which will last one or two years – a one pound bag would suffice for a long while). There are many alternative brands that are liquid or solid.
Seeds: The cheapest part of the whole process. Buy at your local garden shop or hardware. Five packs of seeds (~ $18) will last a year or three.
Germinated seeds go into rockwool starter cubes, which are made from basalt/chalk and formed into an inert fibrous material that soaks up water. About one hundred for $30. This will last a year or two. The starter cubes go into 2” plastic net pots that drop into your drilled tub top holes (about $14 for 25 reusable pots). Clay pebbles, which can be purchased for about $20, can be used to put around the rockwool cubes for support. They are reusable. Alternatively, peat moss can apparently be used in place of the starter cubes and clay pebbles, but it’s an unsustainable product.
Plastic tubs: Using two 38 litre Rubbermaid Roughneck storage boxes with lid ($30 for two) purchased at Canadian Tire. They are blue. Black would be preferable, but these are a nice size (61X41X22 cm). Do not use clear ones: they allow light to penetrate that creates algae.
Other stuff: Most likely in your home: a funnel, tweezers, scissors
You will require a 2” hole saw bit for your drill to cut holes (about $15, unless your friend has one). Borrow your friend’s drill too, if you do not have one, so you can drill the holes, mount the lights, etc.
Total cost to setup: ~$756 (if you borrowed a drill and hole saw.)
Can you do it for cheaper? As mentioned, you can use T5 lights, old plastic tubs, an existing timer, or just use one tub. Some things can be scaled up or down.
What to Grow?
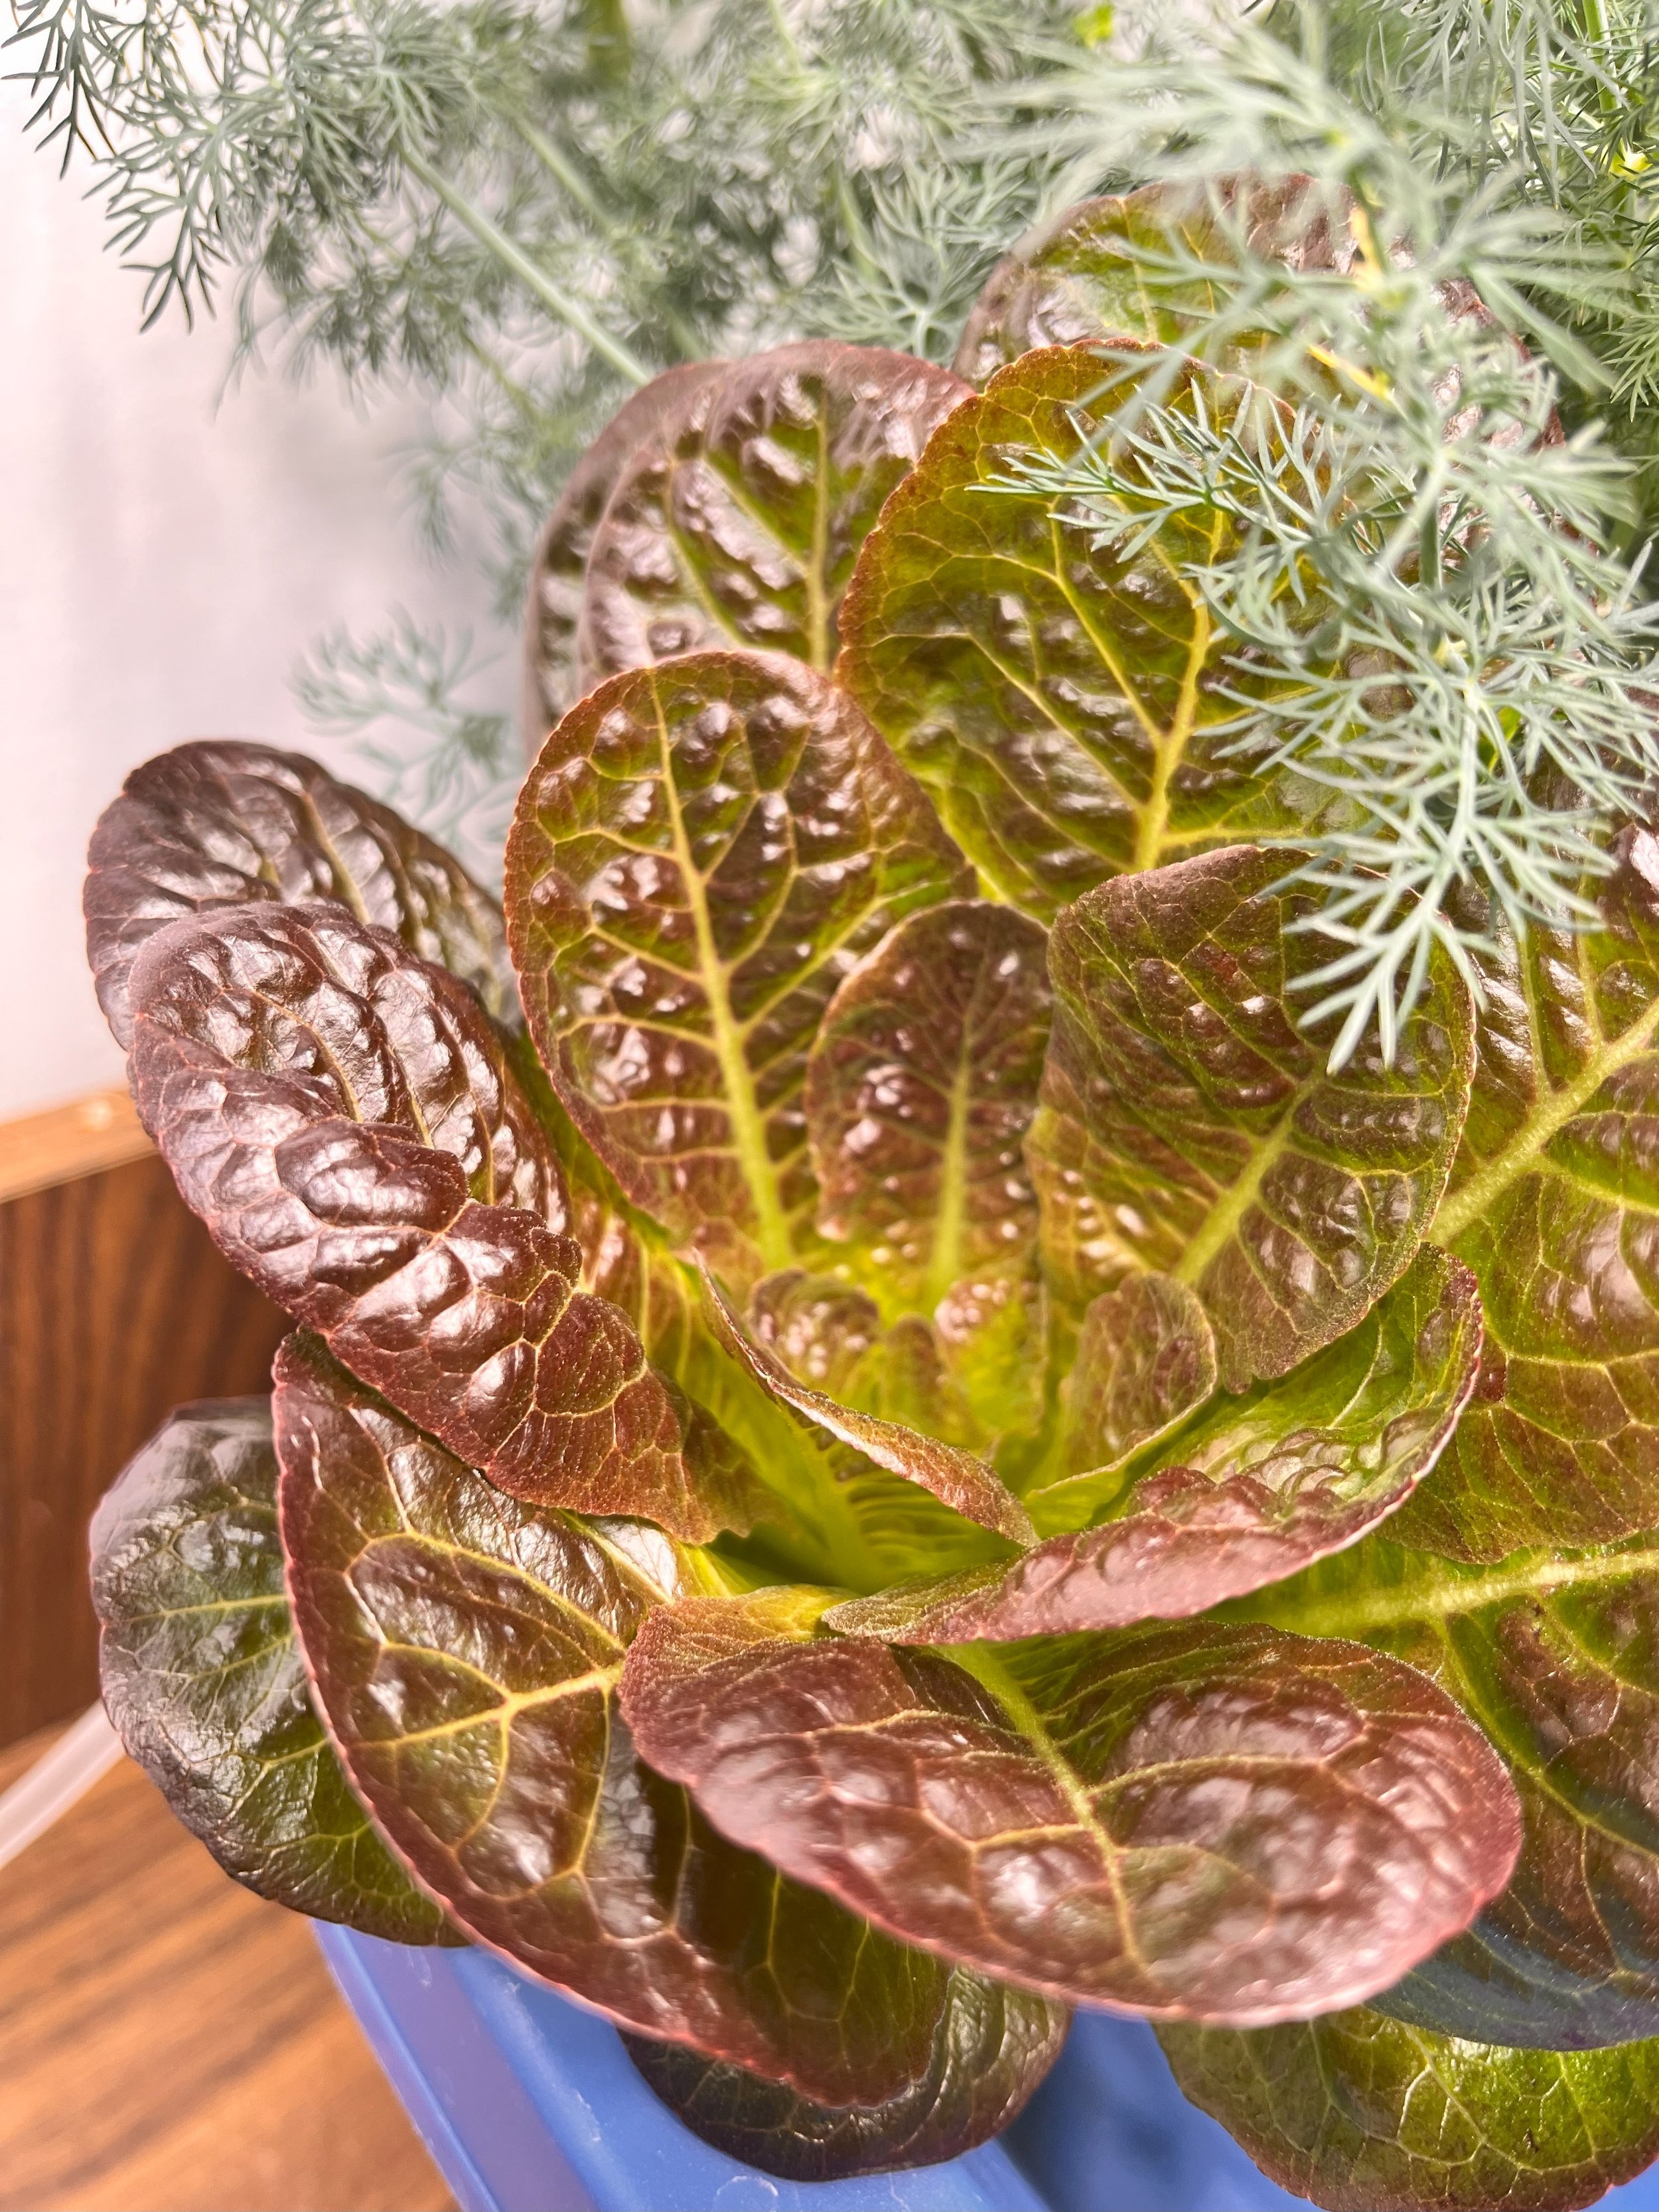
Lettuce; Easy to grow. Start with Paris Island Cos, which is a romaine. You simply harvest the lower outside leaves, and it continues to grow for months. (pH 5.5-6.5; 560-840 ppm, EC 0.8-1.2).
Basil: There are many types available. Start with lettuce leaf. Harvest by taking the top middle stem leaves where flowers will eventually grow. (pH 5.5-6.5; 700-1120 ppm; EC 1.0-1.6).
Parsley: Many types work well, including Italian large leaf, curled parsley. (pH 5.5-6.0; 560-1260 ppm; EC 0.8-1.8). Easy to grow, but takes a while to germinate and root.
Cilantro: Once germinated, grows well. Pick the highest stems. (pH 5.5-6.4; 750-1260 ppm; EC 1.2-1.8).
Dill: Grows very well – pick stems from the very bottom.
Arugula: An excellent herb to grow. The variety I used flowered relatively early: just keep picking them.
*Have tried mustard, kale, mescal with limited success. Apparently, you can grow thyme, lemongrass, sage, marjoram, rosemary, mint, oregano, and chamomile. Going to try celery, bok choy, and chard. Peppers, cucumbers, strawberries, eggplant, peas, beans, and tomatoes are possible. There are mixed reports on the taste of some of these vegetables. It would be interesting to grow hydroponically in the sun, and make sure they are getting the right nutrients.

The Process:
· Geminate the desired seeds. Some people use a heat matt, but it’s not required. I use a wet paper towel folded over the seeds that is kept moist, dark and warm until they have hatched. Lettuce and arugula seeds germinate quickly – basil, oregano and parsley seeds take much longer (2-3 weeks). You can start while you build out the setup.
(Nov 2024: Attempting to use fresh basil, parsley, oregano and cilantro purchased from the grocery store for re-rooting/cloning. Cutting slips to simply root in tap water, then into the tub! Once growing, you can cut clones in perpetuity)
· In the meantime, set up the tubs. Drill up to nine (or fewer) spaced out 2” holes within the flat area of the lids. This gives you options for how many plants, and where you want to put them (any holes not being used for growing a plant need to be covered). A small hole (diameter of your airline tubing) needs to be drilled in the back of the tub above the “water line”. Run the airline tubing from your pump, which is also above the water line, through this hole, attach the air stone(s), and use the suction cups to fasten the line on the bottom of the tub. Use a sharpie pen to mark the “water line” on the inside and outside of the tub. This line is ~2cm below the base of the net pots when they are inserted into the tub lid. Initially, with small, or no roots coming out of the net pots, you want the water touching the net pots. As the roots grow, the water level can be dropped 2-5cm. Some air exposure is required for the upper roots to breathe.
Once the seeds have germinated, transfer them to the rockwool starter cubes with your tweezers, which go into the net pots. The clay pebbles can be used to keep the cubes centered and supported in the net pots. Eventually, you will have roots growing down through the net pot bottoms. Make sure the water level in the tub reaches the roots. A very good YouTube video to watch: https://www.youtube.com/watch?v=HjOwOpKufG0
· Once water is in place, start the air pump up (24 hours/day).
· Adjust the pH of the water (5.5-6.5), and the ppm fertilizer (~700ppm). Note that germinating seedlings can be sprouted without any fertilizer, which can burn them. Adjust lighting to be ~25cm above the young plants.
· Get that fan running whenever the lights are on (~14 hours/day). I point my fan at the LED driver to keep it cool.
Note: It’s generally recommended to change out half of the water “every once in a while”. This requires siphoning (or bailing) half the used water into a container and adding fresh water. This gardener does not get around to that too often. After a few months of growing, it might be best to start anew with one of the tubs. At such time, it would be wise to clean the tub out with soap and water – algae growth can occur, especially if light penetrates the tub.
Other notes:
· When harvesting lettuce, best to cut the bottom outside leaves and allow the centre leaves to grow. Eventually, after a month or three, returns start to diminish. It is best to stagger plantings as you would in any garden.
· In order to keep the lights a proper height above the plants, consider having taller plants (eg. basil, dill, parsley, cilantro) in one tub, and lettuce in another.
· Experiment. What else could you grow? Could you do this outside in the summer months to grow peas/beans/peppers/tomatoes?
· Ideally, make the tubs easier to check the water level, pH and nutrients.
Bugs: After a few seasons, ended up with aphids that I think got there via some soil-based plant I put in there that had been outside. Best not to do that! I did not want to use neem oil, or any chemical, so I started using ~ 2 tablespoons of dish soap in about 1.5 litres of water in a spray bottle. Diligent use will cut their numbers down substantially. But in the end, I tried a method usually used outside: Ladybugs! You can have them delivered from Costco! I put about 10% of the ladybugs on the plants (others kept in the fridge). I added more the following week, etc. The aphid numbers are down substantially, and I don’t find more than the odd ladybug elsewhere. I put some on my houseplants. They also eat spider mites! Yum.
Conclusion:
This process requires somewhat of a commitment in money, time, and learnings. What you achieve is some food independence, sustainability, savings, safety, and superb tasting lettuce and herbs for everyday use.